Swapping pedals is one of the quickest jobs in bike maintenance — once you know the two things that trip everyone up: the left pedal threads backwards, and the right tool depends on the pedal. Here’s the whole job, installation and removal, step by step.

Quick answer: the right pedal has a standard thread — turn it clockwise to tighten. The left pedal is reverse-threaded — turn it counter-clockwise to tighten. To remove either pedal, turn it the opposite way.
| Pedal | Thread | Install (tighten) | Remove (loosen) |
|---|---|---|---|
| Right (drive side) | Standard | Clockwise | Counter-clockwise |
| Left (non-drive side) | Reverse | Counter-clockwise | Clockwise |
Tools You’ll Need
Most bike pedals take an 8 mm Allen wrench; 6 mm is the other common size. The recess is in the end of the spindle, behind the crank arm. Pedals without a hex recess have two flats machined into the spindle instead, and those need a 15 mm pedal wrench.
Different pedals take different tools. An Allen wrench — also sold as a hex wrench, hex key or Allen key — fits into a recess in the inboard end of the spindle. Other pedals have wrench flats on the spindle and take a 15 mm pedal wrench. Check your pedal before you start:
| Tool | Where you’ll find it | Funn models |
|---|---|---|
| 8 mm Allen wrench | The most common size across MTB flat and clip-in pedals | Ripper, Funndamental, Mamba, Mamba S |
| 6 mm Allen wrench | Common on road clipless pedals, and used by some flat pedals too | Python, Black Magic |
| 15 mm pedal wrench | Any pedal with wrench flats machined into the spindle | — |

Not sure which you have? Look at the back of the crank arm, on the wheel side. A hexagonal recess in the end of the spindle means an Allen wrench, and the size is whatever key drops in without any play. Two parallel flats on the spindle, in the gap between crank arm and pedal body, mean a 15 mm pedal wrench. Some pedals give you both.
Beyond the wrench or key, have these on hand:
- Grease — bike-specific grease eases installation and future removal, and prevents corrosion and seizure
- Clean cloth — for wiping dirt and grime off the threads
- Gloves (recommended) — protection from dirt and scrapes

How to Install Bike Pedals
Know Your Right from Your Left
The right pedal (drive side) has regular right-hand threads; the left pedal (non-drive side) has left-hand threads. That reversal is deliberate — it stops the pedals unscrewing as you ride.
Funn pedals can be identified by the lathed mark at the axle head, which marks the left side, or by the Funn logo placement.

Prepare the Crank Arm Threads
Wipe the crank arm threads clean with a cloth. Stubborn dirt or rust may need a bike-specific degreaser. While you’re there, check the threads for wear or signs of cross-threading.
Apply Grease
Put a thin layer of grease on the pedal threads. It lets the pedal thread in smoothly, keeps water and dirt out of the joint, and — most importantly — means the pedal will come off again next time without a fight.
Thread In by Hand
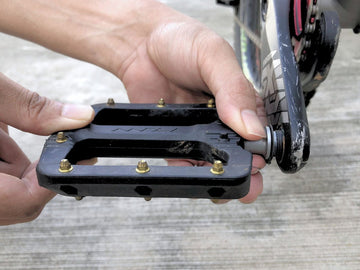
Start each pedal by hand: the right pedal clockwise, the left pedal counterclockwise, a few turns each. Starting by hand is your insurance against cross-threading.

Tighten to Torque
Finish with your pedal wrench or Allen key, applying steady pressure up to the manufacturer’s suggested torque.
For Funn pedals, the suggested torque is 34 Nm (300 lb-in).

Check and Adjust
Spin each pedal by hand. It should rotate smoothly with no wobble, grinding or resistance — wobble suggests the pedal isn’t seated square, grinding points to alignment or lubrication trouble. Adjust before you ride.

Funndamental Flat Pedals
A full-size aluminum platform that installs with a standard 8 mm Allen key — built to take daily abuse.
VIEW FUNNDAMENTALHow to Remove Bike Pedals
Secure the Bike
A work stand is best — it holds the bike steady, lets the cranks spin freely and puts the pedals at a comfortable working height. Leaning the bike against a wall works too.
Reverse the Direction
Fit your wrench or Allen key and apply steady pressure: the right pedal loosens counterclockwise, the left pedal clockwise — the reverse of installation, and the most common point of confusion in the whole job.
If a pedal is stuck, don’t force it. Apply penetrating oil to the threads, give it a few minutes to soak in, and try again.

Finish by Hand and Clean Up
Once the pedal breaks loose, spin the last few turns off by hand. Clean the threads before storing or refitting — leftover dirt, old grease or penetrating oil invites corrosion.

Common Mistakes to Avoid
Cross-Threading
Starting the pedal at an angle damages both pedal and crank arm threads. Always start by hand, and if you feel resistance immediately, stop and recheck the alignment.
Over- or Under-Tightening
Too loose and the pedal can work free mid-ride; too tight and you risk stripping the threads. Hand-tighten first, then wrench to the manufacturer’s torque — a torque wrench takes out the guesswork.
Wrong or Low-Quality Tools
An ill-fitting or flimsy tool slips under load, damaging the pedal — or your knuckles. Make sure the wrench or key seats securely before applying force.
Skipping the Grease
Dry threads make installation rough and future removal miserable. A thin layer of bike-specific grease before installation prevents both.

Neglecting Maintenance
Dirt build-up and dry bearings shorten any pedal’s life. Funn pedals are self-serviceable, with axle replacement kits for each model — a regular clean and re-grease keeps them spinning for years.


Pedal Axle Replacement Kit
Fresh axles, bearings and hardware for every Funn pedal model — good-as-new pedals for a fraction of the price of a new set.
VIEW AXLE KITSPedal Tool and Thread FAQs
What size Allen wrench do I need for bike pedals?
8 mm covers most mountain bike pedals, flat and clip-in alike. 6 mm is the other common size, usual on road clipless pedals and on some flat pedals including the Funn Python and Black Magic. The right size is the one that drops fully into the recess with no play — a slightly loose key will round the recess out the moment you put real force through it.
Can you remove bike pedals with just an Allen wrench?
Yes, as long as the spindle has a hex recess in the end. Use the longest key you have, or slide a length of tube over a short one: pedals are torqued to around 34 Nm and can be far tighter than that after a season of riding, and leverage is what breaks them loose without rounding anything.
What kind of wrench removes bike pedals?
A 15 mm pedal wrench, for pedals with flats on the spindle. It is worth owning the proper tool rather than reaching for a regular 15 mm spanner — a pedal wrench is made thin enough to fit the narrow gap between crank arm and pedal body, and long enough to give you the leverage. Most general-purpose spanners are too thick to seat on the flats at all.
Which way do bike pedals unscrew?
The right pedal unscrews counterclockwise, like a normal bolt. The left pedal unscrews clockwise, because it is reverse-threaded. If a pedal will not move, check you are turning the correct way before you apply more force — turning the wrong way on the left pedal just tightens it further.
Do I need to grease pedal threads?
Yes. A thin layer of bike-specific grease on the spindle threads stops the steel spindle corroding into the aluminium crank arm. It costs thirty seconds now and is the difference between a pedal that comes off with a hex key next season and one that has to be cut out.
Not sure the pedals you have are the pedals you want? Start here: Types of Bike Pedals: How to Choose Your Bike Pedals
Conclusion
Right pedal righty-tighty, left pedal the opposite, grease on the threads, torque to spec — that’s the whole skill. Master it once and you’ll never pay a shop to swap pedals again. And when in doubt, there’s no shame in asking a professional mechanic.
Pedals built to be rebuilt
Flat or clip-in, every Funn pedal is self-serviceable — race-proven components since 1997.
VIEW ALL PEDALS