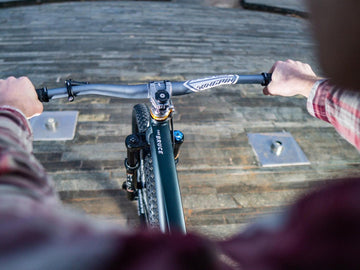

Whether you’re fixing wear, changing geometry or just want a new look, here’s how to replace a mountain bike handlebar — from choosing the right bar to the final safety check.
Choosing the Right Handlebar
Width, rise, sweep and clamp diameter all change how the bike handles — pick a bar that matches your bike and your riding style before you reach for the tools.
Not sure what to buy? Start with: An In-Depth Guide to MTB Handlebar Widths and Selection
Tools Needed
- Caliper
- Allen wrenches (usually 4, 5 and 6mm)
- Torque wrench

Removing the Old Handlebar
Step 1: Check compatibility
Confirm the new bar’s clamp diameter matches your stem — mountain bikes run 31.8mm or 35mm; measure with a caliper to be sure. Funn’s Black Ace, Kingpin, Upturn, Full-On and Flame-On series cover both sizes. Then note your current bar’s height and roll angle so you can replicate the setup.

Step 2: Strip the controls
Remove the grips, brake levers, shifters and any other controls from the bar, and set them aside in order.

Step 3: Remove the old bar
Loosen the stem faceplate bolts (no need to remove them fully) and slide the bar out. High-rise bars may need the faceplate fully removed.

Installing the New Handlebar
Step 1: Align the new bar
Set the bar in the stem clamp, using the center marks to position it accurately, and set the roll angle to your preference (or copy your old measurements).

Step 2: Tighten in a cross pattern
Snug the faceplate bolts lightly first, confirm the position, then tighten in a cross pattern to the torque printed on the stem — even pressure, no over-tightening.

Step 3: Reattach the controls
Refit grips, levers and shifters where they’re comfortable to reach, check the cables route smoothly, and tighten everything down.

Final Adjustments and Safety Check
Confirm everything is tight and aligned — bar roll, lever position, shifter reach — then take a test ride and fine-tune. Keep an eye on the bar over time for wear or loosening bolts, and see a shop if anything feels beyond you.


Upturn High Riser Handlebar
Bring the bars up without stacking spacers — 40, 55 or 75mm rise, in 31.8 and 35mm clamps.
VIEW UPTURNConclusion
A handlebar swap is one of the most rewarding jobs you can do at home: better comfort, sharper control, fresh look. Take your time with alignment and torque, and don’t hesitate to ask a professional if you’re unsure.

Ready for a fresh cockpit?
Alloy or carbon, flat or high-rise — race-proven components since 1997.
VIEW ALL HANDLEBARS