Are you tired of spending unnecessary time and money at the bike shop for something as simple as changing your pedals? Whether you’re a seasoned cyclist or just starting out, learning how to install and remove bike pedals is a must-have skill in your DIY maintenance toolkit. Not only does it empower you to understand your bike better, but it also gives you the freedom to customize your ride as you see fit.
In this comprehensive guide, we’ll take you through an easy and efficient way to install and remove bike pedals, saving you both time and money. So grab your tools, roll up your sleeves, and let’s get started on this ride together!

Required Tools to Install and Remove Bike Pedals
Identifying the Pedal Type:
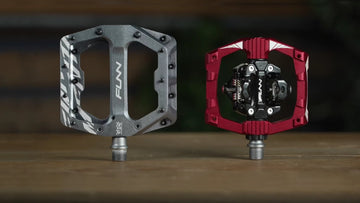
Different pedals may require different tools for installation or removal. Commonly, a 15mm pedal wrench is used for many standard pedals. However, some pedals might have a specific design that requires a 6mm or 8mm Allen key instead. For example, Funn Ripper, Funndamental, Mamba, and Mamba S pedals require an 8mm Allen key; while Python and Black Magic pedals require a 6mm Allen key for installing and removing.

Carefully inspect the pedal to locate the appropriate wrench flats or Allen key slots. Knowing the exact type of pedal you’re working with ensures that you choose the right tool, making the process smoother and preventing any potential damage to the pedals or crank arms.
Required Tools:
Installing or removing bike pedals is a straightforward task with the right tools. Here’s what you’ll need:
- Pedal Wrench: Designed specifically for pedals, a 15mm pedal wrench provides the leverage needed for easy removal or installation.
- Allen Keys: Depending on the pedals’ design, a 6mm or 8mm Allen key may be required. Some modern pedals feature an Allen slot at the end of the spindle.
- Grease: A quality bike-specific grease can ease both installation and future removal, preventing corrosion and seizure.
- Clean Cloth: Essential for wiping away any dirt or grime, a clean cloth ensures that the threads are free of debris.
- Gloves (recommended): A pair of work gloves can protect your hands from dirt and potential scrapes. Having these tools handy will ensure a seamless process, preventing unnecessary stops and frustrations.

It might seem daunting to install and remove bike pedals, but it’s a simple process once you understand the mechanics. Here’s a detailed step-by-step guide:
Understanding the Pedals:
Right vs. Left Pedal: The right pedal (drive side) has regular right-hand threads, while the left pedal (non-drive side) has left-hand threads. This design ensures that the pedals do not unscrew during riding.
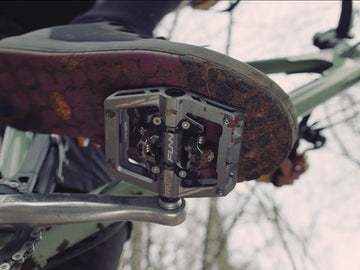
Funn pedals can be identified by the lathed mark at the axle head, which is on the left side, or by the Funn logo placement.

Preparing the Crank Arms:
Before you install or remove bike pedals, it’s essential to clean the threads to ensure a smooth process. Start by inspecting the threads for any visible dirt, rust, or old grease that may have accumulated over time. Using a clean cloth, gently wipe away these contaminants. If the dirt or rust is stubborn, a little solvent such as a bike-specific degreaser may be required to loosen and remove it. Take the time to inspect the threads carefully for any signs of cross-threading or wear.
Applying Grease:
Apply a thin layer of grease to the pedal threads. A thin layer of grease on the pedal threads allows the pedals to thread into the crank arms more smoothly, reducing friction and preventing the metal parts from binding together. This ensures that the installation process is seamless and efficient. Additionally, grease acts as a barrier against corrosion, water, and dirt, which ensures that the pedals can be removed more easily in the future, whether for maintenance or replacement. The lubrication provided by grease also minimizes wear and tear on the threads, protecting both the pedals and the crank arms from potential damage. This contributes to the longevity of these components and helps maintain their performance over time.
Aligning and Tightening:
-
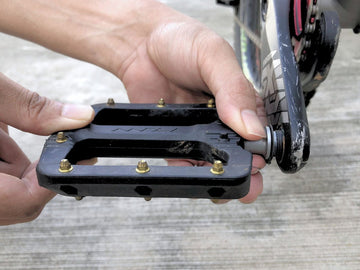
By Hand:
Start by threading the right pedal clockwise (right-hand threads) and the left pedal counterclockwise (left-hand threads) a few turns by hand. This ensures proper alignment and avoids cross-threading, respecting the unique threading direction of each pedal.

-
Using Tools:
After hand-tightening, use your pedal wrench or Allen keys to finish tightening the pedals. Apply steady pressure and tighten the axle to the suggested torque from the manufacturer. Following the manufacturer’s specifications ensures the proper connection between the pedals and crank arms, minimizing the risk of damage or failure during a ride. For Funn pedals, the suggested torque is 34Nm (300lb-in).
Checking and Adjusting:
Once the pedals are installed and tightened to the proper torque, it’s important to test their function. Spin the pedals by hand, paying close attention to their movement. They should rotate smoothly without any wobble, grinding, or resistance. Wobbling may indicate that the pedals are not properly seated in the crank arms, while grinding or resistance could be a sign of improper lubrication or alignment. If you notice any of these issues, it’s essential to take the time to adjust the pedals as necessary.

How to Remove Bike Pedals?
Removing pedals is more than just a task for upgrades or replacements; it’s an essential part of regular bike maintenance. Here’s a straightforward guide on how to remove bike pedals, focusing on efficiency and care to prevent any damage to the bike’s components.
Secure the Bike:
Securing the bike properly is the first essential step in the pedal removal process. While you can lean it against a stable surface like a wall, putting the bike on a stable work stand is highly recommended. The stand provides a firm hold on the bike, preventing any wobbling or falling during the process. It also allows the pedals to spin freely, giving you clear access to work on them. Make sure the stand is adjusted to the right height and angle, providing you with a comfortable position to work from.
Apply the Correct Force:
Start by attaching the pedal wrench or the appropriate Allen key, then apply steady pressure, turning the right pedal counterclockwise and the left pedal clockwise to loosen them. This direction is the reverse of the installation process, so be mindful of this as it’s a common point of confusion.
If you find that the pedals are stuck, don’t force them. Instead, apply a penetrating oil to the threads, which can help break the bond between the metal parts. Allow it to soak in for a few minutes and then try again.

Complete the Removal:
As the pedals start to loosen, you may find that you can turn the last few turns by hand, allowing for a more controlled removal. Once completely removed, it’s crucial to take a moment to clean the pedals properly, especially the threads. If you plan to reuse or store the pedals, a thorough cleaning will remove any dirt, grease, or leftover penetrating oil, preventing potential corrosion or wear.

Common Mistakes in Installing and Removing Bike Pedals
Cross-Threaded Pedals:
Starting the pedal at an angle instead of aligning it properly can lead to cross-threading, damaging both the pedals and crank arms. Always start the threading by hand, ensuring that the threads are properly aligned. If resistance is felt immediately, stop and recheck the alignment.
Over-Tightening or Under-Tightening:
Not applying enough torque when tightening pedals can cause them to loosen during a ride, leading to potential accidents or damage to the pedals and crank arms. On the other hand, excessive force can also strip the threads. To strike the right balance, after hand-tightening a few turns, use a pedal wrench or Allen keys to tighten the pedals firmly but without excessive force. Follow any specific torque recommendations if provided by the manufacturer. Investing in a torque wrench can also help to achieve the correct tension.
Forcing the Wrong Tool or Using Low-Quality Tools:
Using the wrong tool, one that doesn’t fit properly, or a low-quality tool that can’t withstand the force required, can lead to damage to the pedal, the tool, or even personal injury. Poorly made tools may slip or break, causing frustration and potential harm. Use the correct size wrench or Allen key, making sure it fits securely before applying force. Investing in quality tools designed specifically for the task not only ensures a better fit but also withstands the pressures of regular use.
Improper Lubrication:
Failing to lubricate the threads, or using the wrong type of lubricant, can make both installation and future removal difficult. Always apply a thin layer of bike-specific grease to the threads before installation. This not only makes the threading smoother but helps in future removal and prevents corrosion.

Lack of Maintenance:
Regular maintenance goes a long way in preserving the quality and performance of your pedals. Allowing dirt and grime to build up or neglecting lubrication can significantly reduce the pedals’ effectiveness and longevity. The good news for Funn pedal users is that these pedals are self-serviceable, providing a convenient option for upkeep. Funn offers axle replacement kits for each model, allowing you to refresh the axles and ensure optimal performance over time. By keeping a regular cleaning and greasing schedule, you can prevent your pedals from getting stuck and extend their lifespan.

Conclusion
Learning to install and remove bike pedals is more than just a practical skill; it’s a gateway to understanding your bike’s mechanics. By following this guide, you can save time, money, and gain the satisfaction of mastering another aspect of bike maintenance. Always approach with patience and don’t hesitate to seek professional help if needed. Happy riding!