
Welcome to ‘Mountain Bike Handlebar Replacement 101.’ Whether you’re addressing wear, seeking a new look, adjusting geometry, or reducing weight, changing your handlebar can revitalize your mountain bike. We’ll guide you in choosing the right handlebar, list the tools needed, and walk you through removing the old handlebar and installing the new one. The journey concludes with final adjustments and safety checks to ensure your bike is ready for the trails. Perfect for both new and experienced riders, this guide makes bike handlebar replacement straightforward and rewarding. Let’s get started!
Choosing the Right Handlebar
Upgrading your bike with new handlebars can transform your riding experience. However, it’s crucial to select the right type that harmonizes with your bike’s design and your riding style. For an in-depth exploration of these factors and to ensure you make the perfect choice, be sure to read our comprehensive guide: ‘How to Choose a Handlebar.’ It’s packed with valuable insights and tips to help you find the ideal bike handlebars for a more comfortable, efficient, and enjoyable ride.
Tools Needed for bike handlebar replacement
Before you begin, make sure you have the following tools on hand:
- Caliper
- Allen wrenches or hex keys (usually in 4mm, 5mm, and 6mm sizes)
- Torque wrench

Disassemble Old Handlebar
Preparation Steps:
Before initiating the bike handlebar replacement process, verify the new handlebar’s diameter to ensure compatibility with your bike’s stem clamp. Mountain bikes typically feature two standard sizes: 31.8mm and 35mm. Use a caliper for accurate measurement to confirm the correct size. When selecting handlebars, consider options like Funn’s Black Ace, Kingpin, Upturn, Full-On and Flame-On series, which offer these corresponding sizes.
Then, document and measure your current handlebar’s setup, including its height, angle, and diameter at the stem attachment point. This information is invaluable in replicating or fine-tuning the setup with your new handlebars.

Removing the Components:
Remove the grips, brake levers, shifters, and any other controls or accessories from the handlebar first, keeping these components organized and set aside safely.

Removing the Old Handlebar:
Using the appropriate Allen wrench, loosen the bolts on the stem clamp that secure the handlebar in place, being careful not to fully remove the bolts just yet. After all controls are detached and the bolts are loosened, gently slide the old handlebar out of the stem clamp, checking for any resistance to ensure that all bolts are sufficiently loosened for easy removal. For some high-rise handlebars, it may be necessary to completely remove the stem cap to facilitate handlebar removal.

Install New Handlebar
Aligning and Securing the New Handlebar
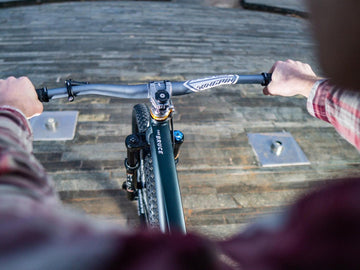
Begin by placing the new handlebar into the stem clamp, aligning it properly with the help of the center mark to ensure accuracy in positioning. Pay close attention to its orientation and height to achieve a comfortable and ergonomic setup.

Once you’ve aligned the handlebar, lightly tighten the bolts on the stem clamp to secure it in place. Adjust the roll angle according to your riding preference, or reference the measurements from your old handlebar. Once you’re satisfied with the handlebar’s position, securely tighten the bolts in a cross pattern for even pressure distribution, adhering to the specified torque values to avoid overtightening. This ensures a secure fit while maintaining the integrity of the components.

Reattaching Components
Reattach the grips, brake levers, shifters, and any other accessories that were removed, using the photos taken before disassembly as a reference if needed. Position them for easy access and comfort during your rides. Additionally, check the cable routing to ensure it is smooth and unobstructed. Once everything is correctly positioned and secured, tighten all clamps and attachments to complete the setup.

Final Adjustments and Safety Check
After installing your new handlebar, ensure all final adjustments and safety checks are thoroughly conducted. This includes making sure everything is tightly secured and correctly aligned, paying special attention to the handlebar roll angle and the placement of the brake levers and shifters for optimal ergonomics and control. Conduct a test ride to assess the comfort and to see if any further adjustments are needed.
Regularly inspect and maintain your handlebar to extend its lifespan; keep an eye on any signs of wear or loosening components. If you encounter complex issues or uncertainties, seeking professional assistance is advisable to ensure the continued safety and performance of your handlebar setup.

Conclusion
In conclusion, replacing your handlebar can significantly enhance your cycling experience, offering improved comfort, control, and safety. By carefully selecting the right handlebar, meticulously installing it, and performing regular maintenance, you ensure a reliable and enjoyable ride. Remember, while DIY handlebar installation can be rewarding, it’s crucial to prioritize accuracy and safety. Don’t hesitate to seek professional help if you’re unsure about any part of the process. Embrace these changes and enjoy the renewed feel of your bike as you explore new terrains and challenges on your rides.