Choosing a headset means decoding a few standards — threaded or threadless, integrated or external, ZS44 or ZS56 — and then pressing it in straight. This guide covers how to pick the right Funn Descend headset for your frame, and how to install it properly.
How to Choose the Right Bike Headset
Step 1: Determine the Type of Headset
First, check whether your bike takes a threaded or threadless headset. Threaded headsets pair with quill stems; threadless headsets pair with modern clamp-on stems and are what you’ll find on nearly every current mountain bike. This guide focuses on threadless.

Threadless headsets come in three styles, defined by where the bearings sit:
| Style | How it sits | Funn model |
|---|---|---|
| Integrated | Bearings drop straight into the frame — no cups to press | Descend Integral |
| Zero stack (ZS) | Cups press into the frame but sit flush with the head tube | Descend ZS |
| External cup (EC) | Cups protrude outside the head tube — durable and easy to service | Descend EC |
Integrated headsets keep the front end clean and light, zero stack blends that look with the versatility of pressed cups, and external cups remain the favourite for heavy-duty use.

Step 2: Choose the Bearing Type
Three bearing designs are used in bike headsets:
| Bearing | How it works | Best for |
|---|---|---|
| Ball bearings | Loose balls in a cup, secured by a cone — tension is fully adjustable | Older and traditional bikes; riders who like to fine-tune |
| Angular contact | Sealed cartridge bearings that handle both radial and axial loads | Modern MTB and road — precise steering under hard riding |
| Needle roller | Small cylindrical rollers with a large contact area | High-load applications like downhill or cargo bikes |

The Funn Descend headset runs angular contact bearings — designed to handle complex loads while staying easy to maintain.

Step 3: Measure the Steerer Tube and Head Tube
With a caliper, measure the outside diameter of the steerer tube’s upper portion for the upper cup size, then the crown race area at the lower end for the lower cup size.

Then measure the head tube’s inner diameter at both ends: the top measurement sets the upper cup size, the bottom sets the lower cup size. Check the head tube length too — if it’s too short, there may not be room to properly accommodate the stem.

Step 4: Match Your Measurements to a Headset
Use the Standardized Headset Identification System (S.H.I.S.) to translate your measurements into a headset spec, and check your frame manufacturer’s documentation to confirm. The full list of Descend models is below.
New to headset codes like ZS44/28.6? Our explainer decodes them all: Bike Headset Types Explained: An Introduction to the S.H.I.S


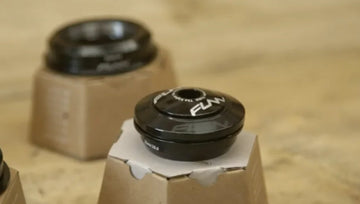
Descend Upper Headset
Zero-stack upper cups in ZS44, ZS49 and ZS56 for 28.6 mm steerers — aerospace-grade AL6061 with angular contact bearings.
VIEW DESCEND UPPERHeadset Installation: A Step-by-Step Guide
Step 1: Prepare the Tools
- Headset press
- Allen keys
- Grease
- Hammer
- Headset cup removal tool (if replacing a headset)

Step 2: Remove the Old Headset (If Applicable)
Detach the stem and fork, then use a headset cup removal tool to push the old cups out of the frame.

Step 3: Press in the New Cups
Apply a thin layer of grease to the inside of the head tube and the outer surface of each cup.

Position the cups carefully and press each one into the frame gently and evenly with a headset press. Press the upper and lower cups separately, checking alignment as you go.
Step 4: Install the Fork
Grease the bearings lightly to prevent rust, then seat them in the upper and lower cups.

Slide the fork into place, making sure washers, the compression ring and seals sit as the headset’s design intends, then fit the top cap.

Step 5: Install the Stem
Mount the stem onto the steerer tube, adding spacers as needed. Leave a 2–3 mm gap between the top of the steerer tube and the top of the stem (or topmost spacer) — that gap is what lets the top cap preload the headset. Too small, add a spacer; too large, remove one.

Step 6: Preload the Headset
With the stem’s steerer clamp bolts loose, fit the top cap and tighten its bolt until the fork rotates smoothly with no play — no gap, no slack, no excess friction.

Step 7: Align the Handlebar and Tighten the Steerer Clamp Bolts
With the clamp bolts slightly snug, stand over the bike and sight down from the handlebar to the front wheel, turning the bar gently until it sits perfectly square. Take your time here.

Once aligned, tighten the clamp bolts alternately for even clamping, following the torque spec printed on the stem or in its manual. When in doubt: snug, not forced.
Step 8: Final Inspection
Hold the front brake and rock the bike gently forward and back — any knocking means the headset has play. Steering should feel smooth, with no grinding or looseness, and every bolt should be at spec. Anything unusual, recheck the assembly.

Swapping the stem while you’re in there? Follow our full walkthrough: A Guide to Replacing Your Threadless Bike Stem

Descend Lower Headset
Eight lower cup sizes from ZS44/30 to ZS66/46, including EC44 and EC49 external cups — matched to the Descend upper.
VIEW DESCEND LOWERConclusion
Measure carefully, match the spec, press the cups in straight and preload correctly — that’s the whole job. With the right tools and a bit of patience, a headset swap is well within a home mechanic’s reach.

A Descend for every frame
Integral, ZS and EC — aerospace-grade AL6061 with angular contact bearings, race-proven since 1997.
VIEW ALL HEADSETS